Printing on Campus
Quick Links
Frequently Asked Questions
I don't have a College ID
You will need to visit East Campus Atrium to have a College ID printed for you.
I don't know my Student ID / NetID
Your Student ID consists of just the eight digits of your NetID. (Forgot your NetID?)
e.g. 12345678@student.commnet.edu
I lost my College ID, what do I do?
You will need to get a replacement College ID. Once you replace the lost/stolen card, you will need to register the new card using the same process as before.
I don't have my College ID with me, what do I do?
If your College ID isn’t lost or stolen, but you just don’t have it with you, you may still sign into a printer/copier manually to print, copy, and scan.
Tap the AD Login button

- Enter your Student ID
- Enter your password
- Tap Login

I see a balance on the screen when I go to print, what is it?
You may see a dollar amount associated with your account when you go to print. This is not an actual monetary value, but simply a representation of your print quota.
All students have a 400 page/month print quota. This will renew automatically at the first of each month. If you exceed your print quota, you can visit the IT office to have it manually reset.Print quotas have been suspended indefinitely.
I accidentally registered my credit card or other ID card
If you have accidentally registered a different card other than your College ID, you may simply go through the same registration steps using your College ID to update your account.
Only one card is allowed to be associated with your account at any given time, so you may always be able to re-register a new card.
I tried to print by email, but don't see the print job in my queue.
Make sure:
- The email address you are sending from is your college email address. Personal email addresses are not supported.
- The email must include an attachment. The body of the email is not supported.
- The attachment must be one of the following types: PDF, DOCX, XLSX, PPTX
- Double-check that you are sending your emails to: NK-PRINT@NCC.COMMNET.EDU
- If you have just emailed, please give the system a few minutes to process your attachment. It is not instantaneous.
I tried to scan to my email, but don't see any email in my inbox
The Scan to Email feature will send your email from your college email address. Make sure:
- You don’t have any email rules filtering your own address as a sender.
- Check your junk/spam folder.
Registering your College ID Card
You may register your existing College ID card on any badge reader enabled printer/copier on campus.
1. Tap your ID Card
Hold your College ID over the badge reader until you hear a beep.
It is recommended to keep your College ID by itself when registering. Remove your ID from a wallet or bundle of credit cards or other smart cards. You do not want to inadvertently register another type of card other than your College ID. But if you do, just repeat these steps using your College ID.

2. Enter your NetID
Use the on screen keyboard to enter your account details.
- Tap the User Name field and enter just the eight digits of your NetID
- Tap the Password field and enter your password
- Tap the Login button.
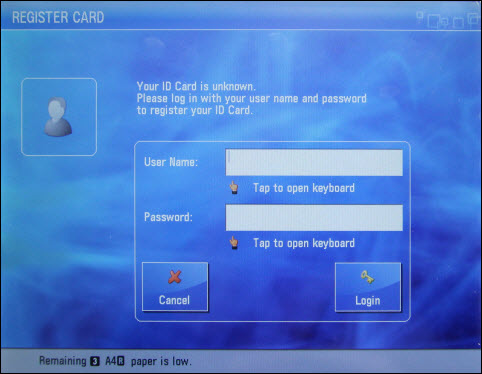
Your College ID is now registered to allow printing from any badge reader enabled printer or copier on campus. Learn how to print documents sent to your print queue.
How to Guides
How to Print
Whether you use a campus computer or if you print by email from a personal device, printing requires signing into a printer/copier and selecting the specific job to be printed. All print jobs are sent to your personal print queue.
1. Tap your ID Card
Hold your College ID over the badge reader until you hear a beep.
You will have needed to first register your College ID before. Learn how to register your College ID for printing. Once your College ID is registered to print, you may tap it on any badge reader enabled printer on campus.
2. Tap Secure Print
Secure Print will show you all available print jobs in your personal queue
After you sign in with your College ID – you will see several options including Copy, Scan and Send, and Secure Print.
Tap Secure Print.

3. Select Your Print Job
Depending on how many print jobs you have, you may see a few or a lot of entries on this screen
Review the list and tap the print job you would like to start.
Tap Print + Delete to begin printing your document.
- Alternatively, you may tap Print + Keep if you would like to retain this specific print job for additional printing later on.
- You may also adjust settings for this print job by tapping Options.
- Tap Print All to print all jobs in the queue.

How to Copy
Copying requires you to sign into the copier with your NetID or by tapping your College ID.
1. Tap your ID Card
Hold your College ID over the badge reader until you hear a beep.
You will have needed to first register your College ID before. Learn how to register your College ID for printing. Once your College ID is registered to print, you may tap it on any badge reader enabled printer on campus.
2. Load Documents and Tap Copy
Load your documents into the feeder on top
After you sign in with your College ID – you will see several options including Copy, Scan and Send, and Secure Print.
Tap Copy.
3. Adjust Copy Settings and Begin Copying
Adjust settings on the copy job as desired. When ready, hit the green Start button.

How to Scan
Scanning requires you to sign into the copier with your NetID or by tapping your College ID.
1. Tap your ID Card
Hold your College ID over the badge reader until you hear a beep.
You will have needed to first register your College ID before. Learn how to register your College ID for printing. Once your College ID is registered to print, you may tap it on any badge reader enabled printer on campus.
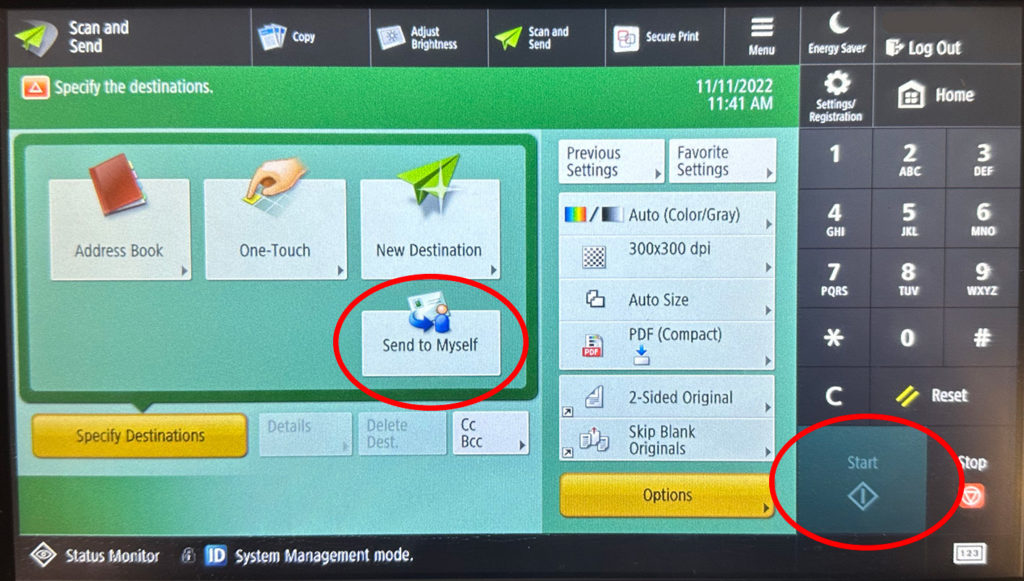
2. Load Documents and Tap Scan and Send
Load your documents into the feeder on top
After you sign in with your College ID – you will see several options including Copy, Scan and Send, and Secure Print.
Tap Scan and Send.
3. Adjust Scan Settings and Begin Scanning
Your email address will already configured
Adjust settings on the scan job as desired. If you simply want to scan to your email address, tap Send to Myself, then tap the green Start button.
You may also scan to other email addresses by tapping New Destination and manually typing them in.
Printing by Email
You may print from any personal device to a badge reader enabled campus printer by email.